> For the complete documentation index, see [llms.txt](https://docs.xorosoft.com/llms.txt). Markdown versions of documentation pages are available by appending `.md` to page URLs; this page is available as [Markdown](https://docs.xorosoft.com/whats-new/release-notes/previous-releases/2025/may-1.0-2025-release.md).
# May 1.0 2025 Release
### Added the ability to Batch Update Default Location in Item Centre
We’ve introduced a new Batch Update capability in the Item Centre, allowing users to efficiently update the Default Location for multiple items at once.
**How It Works:**
1. Navigate to the **Item Centre**.
2. Select the items you wish to update and go to **Options > Batch Update**.
3. Choose **Default Location** from the update options.
4. Enter the desired default location and click **Update** to apply the change to all selected items.
### Added the ability to Batch Update Expected Ship Date and Expected Delivery Date in Purchase Order Centre
We have introduced two new batch update options in the Purchase Order Centre: Expected Ship Date and Expected Delivery Date.
#### How It Works
1. Navigate to the **Purchase Order Centre.**
2. Select the orders for which you wish to update the expected ship date or expected delivery date and go to Options > Batch Update.
3. In the "Column Name" field, select the Expected Ship Date or Expected Delivery date from the update options.
4. Enter the desired date in the "Value" field and click "Update" to batch apply the date to the selected orders.
### Enhanced Visibility of Customer Alerts in Apply Credits/Deposits
We have enhanced the visibility of Customer Alerts within the Apply Credits/Deposits module to improve user awareness and streamline workflows.
#### Feature Details
Previously, Customer Alerts were not displayed when processing payments by applying deposits or credits within the Apply Credits/Deposits module. With this update, the Customer Alert will now be shown in the following scenarios:
* When a customer is selected manually in the Apply Credits/Deposits module.
* When the module is accessed from sales order or invoice payment module and the customer is already selected on the screen.
### Ship Service and Ship Carrier Are Now Mandatory for selected Delivery Methods in Sales Orders
To improve shipping accuracy and reduce order processing errors, a new validation check has been added to the **Sales Order (SO) module** related to delivery methods and shipping details.
#### Feature Details
If Ship Method is set to either Delivery (Own Truck) or Delivery (Third Party) when creating a sales order, the system will now validate that a Ship Carrier or Ship Service has been selected.
If neither a carrier nor a service is specified, the system will prevent the sales order from being saved and display a message in the bottom-right corner of the screen, prompting the user to provide the missing shipping information.
### Update Vendor Address Directly from Purchase Order, Item Receipt, and Bill Modules
We have introduced a new enhancement that allows users to update vendor addresses directly from the Purchase Order, Item Receipt, and Bill modules. This feature streamlines the process of managing vendor information, ensuring that any updates made during transaction processing are accurately reflected in the vendor's profile.
{% hint style="info" %}
This is an app-config based enhancement.
{% endhint %}
#### How it works?
* A new application configuration titled **"Enable Vendor Address Update from Purchase Order, Item Receipt and Bill modules"** has been introduced to facilitate this feature.
* When this setting is enabled, users will see **“Update Address in Vendor”** toggle option when editing vendor address details in the Purchase Order, Item Receipt, or Bill screens.
* If users update the vendor address and enable this toggle, the changes will be automatically reflected in the associated vendor’s master record.
### Configure Defaulter Customer Based on Credit Limit or Overdue Invoices
We’ve enhanced the customer restriction mechanism by introducing configurable criteria to define **defaulter customers**. This update provides greater flexibility in determining when a customer should be restricted based on their financial standing.
{% hint style="info" %}
This is an app-config based enhancement.
{% endhint %}
#### How it works?
* A new application configuration setting titled **“Criteria for Restricting Defaulter Customers”** is now available.
* This setting allows users to define the criteria on which a customer is flagged as a defaulter and subject to restrictions in transaction processing.
* The config offers the following options:
* **Credit Limit**: Customers exceeding their assigned credit limit will be marked as defaulters.
* **Overdue Invoices:** Customers with unpaid invoices past the due date will be flagged as defaulters.
* Depending on the selection, customers who exceed their credit limit or have overdue invoices will be considered defaulters and will subject to restrictions on sales.
### Image Magnification Support in B2B Portal
We have introduced a new enhancement to our B2B platform that significantly improves the user experience for viewing product images. This update introduces an image magnification feature that allows users to zoom in the image and view important details.
Users can now zoom in on product images to see intricate details that may otherwise be missed in standard views.
**Where You’ll See the Image Magnifier:**
1. **Product Detail Popup**
* On the B2B platform, whenever a user views a product in a popup modal, they can now click on the product image to activate the magnifier.
* This enhancement ensures that business customers can better assess product textures, finishes, or packaging before making a decision—especially valuable for industries where visual quality matters.
2. **Customer Portal – Profile Page (Presentation Images)**
* Presentation images displayed on a user’s profile page within the customer portal can now be magnified.
* Click on the presentation image to magnify it.
* This empowers customers to present their own materials with greater professionalism and provides viewers with a seamless way to explore image content without losing context.
### Added Confirmation Alert When Applying Linked Credit Memos
We've enhanced the invoice payment process to provide greater clarity when applying credit memos that are partially linked to Sales Orders.
Now, when you attempt a credit memo linked to a sales order to a customer invoice, the system checks the available unlinked credit amount. If the amount you're trying to apply exceeds the unlinked balance (due to part of it already being linked to an SO), a clear alert will appear in the confirmation popup. This alert notifies the user that the portion of the amount being applied is already associated with an SO, helping prevent unintended allocations.
Click "OK" to proceed with applying the credits to the invoice.
{% hint style="warning" %}
Please note: If only part of the linked credit memo is applied to another invoice, the system will prevent you from quick shipping the associated Sales Order (SO). Quick ship is only allowed when the full amount of the linked credit memo has been used.
{% endhint %}
### Free Shipping Functionality for B2B Orders
We have introduced a new enhancement that enables **free shipping** on B2B orders based on **cart value-based discount rules** defined in the **Presentation Centre**. This feature allows businesses to offer free shipping incentives without coupling them to existing cart discounts.
#### Feature Details
* A new **“Free Shipping”** toggle has been added within the **Discount Rules** section of the **Presentation Settings**.
* When this toggle is enabled for a specific discount rule, and the **cart subtotal** meets the defined criteria, **free shipping** will automatically be applied to the order.
* This functionality is entirely **independent of any discount applied** to the cart — only the **cart subtotal** is considered.
**How to Configure**
1. Go to **Presentation Centre** > **Presentation Settings**.
2. Navigate to the **Discount Rules** section.
3. Edit or create a discount rule and enable the **“Free Shipping”** toggle.
### **New Module – Upload Wave Create**
#### **Overview**
We are excited to introduce a new module in XoroERP called **"Upload Wave Create"**. This utility is designed to streamline wave creation by allowing users to define allocation quantities for sales orders via a structured upload process. It is especially useful for managing bulk allocations efficiently and with precision.
This enhancement brings flexibility and automation to the wave allocation process while ensuring full traceability and data validation at every step.
***
#### **Key Functionality**
The **Upload Wave Create** module allows users to:
1. **Download a pre-formatted template** directly from the module.
2. **Populate wave allocation data** into the template — including sales orders and quantities.
3. **Upload the completed file** back into the system.
4. **Specify item matching logic** via the *Item Identifier Code* dropdown.
5. **Trigger allocation logic** based on grouped records and field values in the file.
***
#### **Item Identifier Code**
During upload, users must select an **Item Identifier Code** from the dropdown. This value determines how the system interprets the **item number field** in the uploaded file:
* For example, if "Item Code" is selected as the identifier, the system will match items based on their internal item code.
* This flexibility allows the upload process to work with multiple item identification standards (e.g., SKU, Barcode, or External Item Code).
***
#### **Core Validation & Allocation Logic**
The module includes built-in validation and allocation mechanisms to ensure robust and error-free processing:
#### **Mandatory Field Validation**
* The system performs strict checks to ensure all **required fields** in the template are populated before processing begins.
* Missing or invalid entries are flagged immediately, preventing partial or incorrect wave creation.
#### **Allocation Type Validation**
* The system supports and validates **multiple allocation types**, ensuring that all logic paths behave as expected based on selected parameters.
#### **Grouping by Third Party Reference No**
* Uploaded records are **grouped by `ThirdPartyRef No`**.
* Each group is processed **only if all rows within the group pass validation**.
* Groups containing errors are skipped, and feedback is provided, allowing users to correct and re-upload only the affected data.
***
#### **Field-Level Functional Validations**
The module also supports and verifies the correct behavior of the following special flags:
* **Auto Close SO Line:** If enabled, this will auto-close the Sales Order line upon full allocation from the wave.
* **Lock Flag:** Locks the inventory allocation, preventing changes unless explicitly unlocked.
* **AllowInventoryAdj:** Enables inventory adjustment to be made during allocation if discrepancies are found.
### **Bank Reconciliation – Outgoing Payments Integration**
**Module:** Bank Reconciliation, Outgoing Payments
#### Overview
This release introduces enhancements to the **Bank Reconciliation** and **Outgoing Payments** modules within XoroERP. These improvements focus on reducing manual effort, increasing automation, and improving the reconciliation workflow.
#### Enhancement Details
**1. Outgoing Payment Creation from Bank Reconciliation Options**
A new feature has been introduced that allows users to create **Outgoing Payments** directly from the **Bank Reconciliation module**. The option can be accessed by clicking the line-level Options in the Bank Reconciliation module.
**Functionality**\
While reconciling bank transactions, if a matching outgoing payment does not already exist, users now have the option to create one directly from the reconciliation interface. This eliminates the need to navigate separately to the Outgoing Payments module, streamlining the reconciliation workflow and reducing process time.
**Effect in System**\
The newly created outgoing payment will be posted and linked to the selected bank transaction, allowing users to continue reconciliation immediately after its creation.
***
**2. Auto-Creation of Bank Reconcile Rules on Outgoing Payment Creation**
The system now supports **automatic creation of Bank Reconcile Rules** when an **Outgoing Payment** is created from the Bank Reconciliation module as a journal entry.
**Functionality**\
Whenever an outgoing payment is created (either directly or through journal entries in the reconciliation module), the system will attempt to auto-generate a bank reconcile rule using the payment details, provided the "Auto Create Rule" toggle is enabled.
**Scope and Behavior**
* The rule will be generated based on key attributes of the outgoing payment such as bank account, vendor name, amount pattern, and other matching criteria.
* Bank Reconcile Rule creation will occur for **all outgoing payment transactions**, **except** when an existing rule match is already found (i.e., in the "Rule Found" scenario), and only if the auto-create toggle is enabled.
* This ensures that the system continuously learns from new transactions and builds rules for future automated matching during reconciliation.
***
#### System Impact
* Reduces manual effort in both payment creation and rule definition during reconciliation.
* Improves the efficiency and accuracy of the reconciliation process through automated rule generation.
* Ensures consistency and repeatability in transaction matching for recurring payment patterns.
{% hint style="warning" %}
Ensure that the "**Auto Create Rule**" toggle is enabled in the reconciliation settings to take full advantage of the new automation feature. It is also recommended to review the created rules periodically to maintain rule accuracy and optimize reconciliation results.
{% endhint %}
### **Reconcile Bank Account Module – Additional Match Found Columns**
#### **Overview**
To enhance transparency and provide more contextual information during the bank reconciliation process, new data columns have been added to the **"Match Found"** section of the **Reconcile Bank Account** module in XoroERP. This enhancement is aimed at helping users make quicker, more informed decisions when validating and matching transactions.
#### How it works?
#### **New Columns Added to "Match Found" Side**
The following columns have been added to provide better visibility into the matched transactions:
1. **Account Code**
* **Description:** Displays the **General Ledger (GL) Account Code** associated with the matched transaction.
* **Purpose:** Allows users to immediately verify the accounting treatment of a transaction without navigating to the underlying journal entry or voucher. This is particularly useful when reconciling multiple similar entries or validating transactions against specific accounts.
2. **Additional Txn No**
* **Description:** Displays the value from **Reference Number 2** of the transaction.
* **Purpose:** Enables deeper cross-referencing with internal or external references such as vendor invoices, payment vouchers, or banking reference numbers. This aids in accurate transaction matching and audit trails.
#### **Existing Vendor Name Field**
* The **Vendor Name** field continues to be displayed (when available), offering an additional point of verification for payables-related transactions.
{% hint style="warning" %}
* No additional configuration is needed.
* The new columns are automatically available in the "Match Found" section for all users with access to the Reconcile Bank Account module.
* Existing workflows are preserved; this is an additive enhancement focused on improving visibility.
{% endhint %}
## WMS Enhancement
### Item Lookup: Inner Case and Master Case UPC Scanning Support
The *Item Lookup* module within the WMS has been enhanced to support the scanning of **Inner Case** and **Master Case** UPCs.
Users can now scan UPCs associated with both **Inner Cases** and **Master Cases** during item lookup.
### Multiple Columns Added to Scan ASN Module
We have added multiple columns in the Scan ASN module. The following columns are now available and displayed in the **Scan ASN module**:
1. **Vendor**
2. **Tracking#**
3. **Trailer#**
4. **BOL#**
These fields provide essential logistics data directly within the ASN scanning workflow, improving operational efficiency and traceability.
#### Restricted visibility of Shipment Info Fields
Additionally, a new app config has been introduced to control the visibility of the shipment info fields, Tracking #, Trailer #, and BOL#.
**Select Shipment Fields to Display on the Scan ASN Screen:** This config allows users to select which of the newly added shipment info fields (Tracking #, Trailer #, and BOL #) are visible to users in the Scan ASN module.
### **Batch Manufacturing & Wave Processing**
#### **Modules:** Sales Order Center, Wave Processing, Manufacturing
***
#### **Overview**
This release introduces significant enhancements in **XoroERP’s Sales Order Center module** and **XoroWMS**, focusing on **batch manufacturing automation, improved wave processing, and a new Manufacturing module in WMS**. These updates enhance **efficiency, automation, and accuracy** in managing **batch manufacturing orders (BMO), wave assignments, and manufacturing processes**.
The key highlights of this release include:
* **Automated Batch Manufacturing Order (BMO) creation** from **Sales Order Center**.
* **Enhancements to Wave Templates** for **LPN-based selection and prioritization**.
* **Optimized MO wave picking and staging** in WMS with a new **Manufacturing tab** in the **Picking module**.
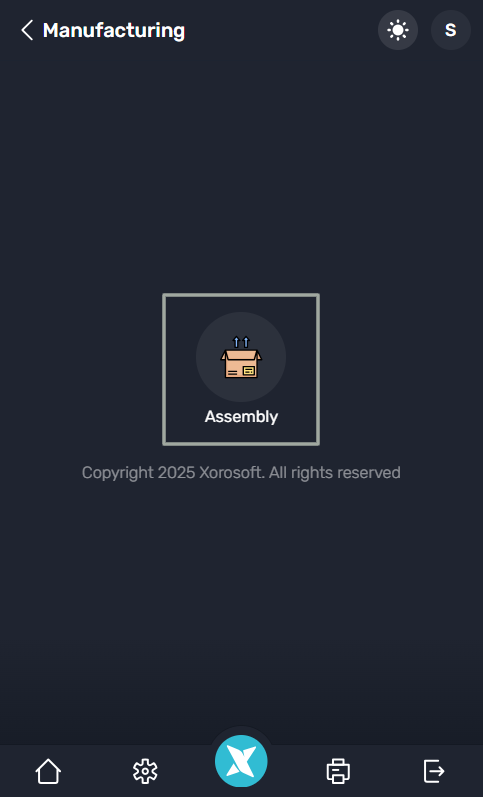
* **Introduction of the Assembly module** in WMS for **MO Finished Good assembly**.
* **Auto-allocation of linked Sales Orders** after assembly completion.
***
#### **Enhancements in XoroERP**
#### **A. Batch Manufacturing Order (BMO) Workflow Enhancement**
To streamline manufacturing order creation, XoroERP now allows **automated batch MO generation** directly from **Batch Sales Orders**, eliminating the need for **manual MO creation**.
**New "Generate Batch MO" Option in SO Centre**
* The **Generate Batch MO** feature enables users to create BMOs for **all manufacturable items** present in the selected **Sales Orders (SO)**.
* Users can select one of the following methods for batch MO generation:
* **Item-Based MO Generation**: Creates **one MO per Item**, aggregating total quantity across all selected SOs.
* **Sales Order-Based MO Generation**: Generates **one MO per Item per Sales Order**, keeping MOs linked to their respective SOs.
#### **B. Wave Template Enhancements**
* **New LPN Selection Capability**: Wave templates now allow **specific selection of LPNs** (lot numbers) during the waving process.
* **Configurable Sorting for LPN Attributes**: Items in waves can now be sorted based on attributes like **Expiry Date, Manufacturing Date, or Lot Numbers**.
* **Grouping of Manufacturing Orders (MO) by Finished Goods**: XoroERP now enables **grouping of MOs** by finished goods across all associated Sales Orders when generating BMOs.
#### **C. Enhancements in Batch MO Subform**
* Users can **select Carton Break Rule and Priority Code** when clicking **"Start Picking"** in the **Batch MO subform**.
* The **MO wave automatically applies the correct carton break rule and priority code**, ensuring optimal inventory allocation.
***
#### **Enhancements in XoroWMS**
#### **A. Wave Assignment Process Enhancement**
* Users can now **Pick and Stage MO waves** via the **WMS Pick and Stage Module**.
* If **multiple OLPNs** are generated during MO wave picking, they **must be consolidated before the assembly process** to ensure that all raw materials are available in a single OLPN.
* **New "Manufacturing" Tab on the Pick Assignment Screen**:
* Allows users to **search and assign OLPNs** by entering either the **Batch Manufacturing Order Number** or **Batch Sales Order Number**.
* Introduces a **new "Manufacturing" filter** in **Pick Task Assignment** to filter **MO waves**.
* Waves can now be searched based on **Wave Number, Batch Number, or Order Number**.
#### **B. New "Manufacturing" Module in XoroWMS – Assembly Process**
A new **Manufacturing module** has been added to WMS, enabling users to assemble **MO Finished Goods** efficiently.
**1. Scan OLPN**
* Users must scan the **OLPN associated with the MO wave**.
* The system validates the OLPN on the **"Enter" event**, ensuring it is linked to an MO.
* Displays two tables:
* **BOM (Bill of Materials) List**
* **Linked Order List** (only if the MO is linked to multiple SOs).
**2. Linked Order Line Selection**
* Clicking a **linked order line** updates the **Required Quantity** in the BOM table based on the linked order’s quantity.
**3. Assembly Process & Validations**
* **Confirm Assembly**: Clicking **"Accept"** renders a confirmation pop-up displaying:
* LPN Attributes
* **To-Be-Produced Quantity of MO**
* Users can update **LPN attributes** and **reduce the to-be-produced quantity** if needed.
* If the **quantity is reduced**, a **Move Residual Quantity to ILPN** modal is displayed.
* Upon confirmation:
* The **excess raw material** is moved to the designated ILPN.
* The **MO Finished Good is assembled**.
#### **C. Validations in the Assembly Process**
* **All raw materials must be present in a single OLPN** before assembling the MO Finished Good.
* **Users cannot increase the "To-Be-Produced" quantity**.
* The **OLPN must be at a staging location** for assembly to proceed.
#### **D. Auto-Allocation of Linked SO (XoroERP)**
* Once the **MO Finished Good is assembled**, the linked **Sales Order (SO) is automatically allocated and marked as "Picked and Staged"** at the same OLPN.
* This eliminates the need for **manual allocation**, ensuring faster order fulfillment.
***
#### **How to Use These Enhancements?**
1. **Generate a Batch MO from SO Centre**:
* Select **Item-Based MO Generation** or **Sales Order-Based MO Generation**.
2. **Apply Wave Template Enhancements**:
* Use **LPN selection and sorting criteria** in the wave template.
3. **Pick and Stage MO Waves in WMS**:
* Use the **Manufacturing Tab in Pick Assignment** to consolidate OLPNs.
4. **Scan OLPN & Assemble Finished Goods in Manufacturing Module**:
* Scan OLPN → Verify BOM & Linked Orders → Confirm Assembly.
5. **Auto-Allocate Linked SO**:
* Upon assembly, the linked SO is automatically allocated and staged.
{% hint style="info" %}
In the case of a partial pick for an MO wave, the system will restrict unassignment of the task.
{% endhint %}
***
* **For further assistance**, contact the **XoroERP/XoroWMS support team**.
These enhancements improve **manufacturing automation, wave efficiency, and warehouse operations**, ensuring a **faster, more accurate, and streamlined fulfillment process**.
🚀 **XoroERP & XoroWMS Team** 🚀
---
# Agent Instructions
This documentation is published with GitBook. GitBook is the documentation platform designed so that both humans and AI agents can read, navigate, and reason over technical content effectively. Learn more at gitbook.com.
## Querying This Documentation
If you need additional information that is not directly available in this page, you can query the documentation dynamically by asking a question.
Perform an HTTP GET request on the current page URL with the `ask` query parameter, and the optional `goal` query parameter:
```
GET https://docs.xorosoft.com/whats-new/release-notes/previous-releases/2025/may-1.0-2025-release.md?ask=&goal=
```
`ask` is the immediate question: it should be specific, self-contained, and written in natural language.
`goal` is optional and describes the broader end goal you are ultimately trying to accomplish on behalf of the user. GitBook uses it to tailor the answer towards what is most useful for that goal.
The response will contain a direct answer to the question and relevant excerpts and sources from the documentation.
Use this mechanism when the answer is not explicitly present in the current page, you need clarification or additional context, or you want to retrieve related documentation sections.