> For the complete documentation index, see [llms.txt](https://docs.xorosoft.com/llms.txt). Markdown versions of documentation pages are available by appending `.md` to page URLs; this page is available as [Markdown](https://docs.xorosoft.com/xoroerp-1/admin/timeclock-entry/timeclock-entry-fields.md).
# Timeclock Entry Fields
The TimeClock Entry module provides structured controls at header level, tab level, and record level to ensure secure and accurate time tracking. Below is a detailed breakdown of all available fields, icons, actions, and validation logic.
### Header Level Buttons
The Header Level Buttons allow users to perform primary actions such as clocking in, clocking out, and managing time entries within the TimeClock Entry module.
| Button | Tab | Visibility | Description |
| -------------- | --------- | ---------------------- | ------------------------------------------------------------------ |
| Clock In | My | All Users | Starts a new time entry. Only available when no open entry exists. |
| Clock Out | My | All Users | Closes the active open entry. Appears after successful clock-in. |
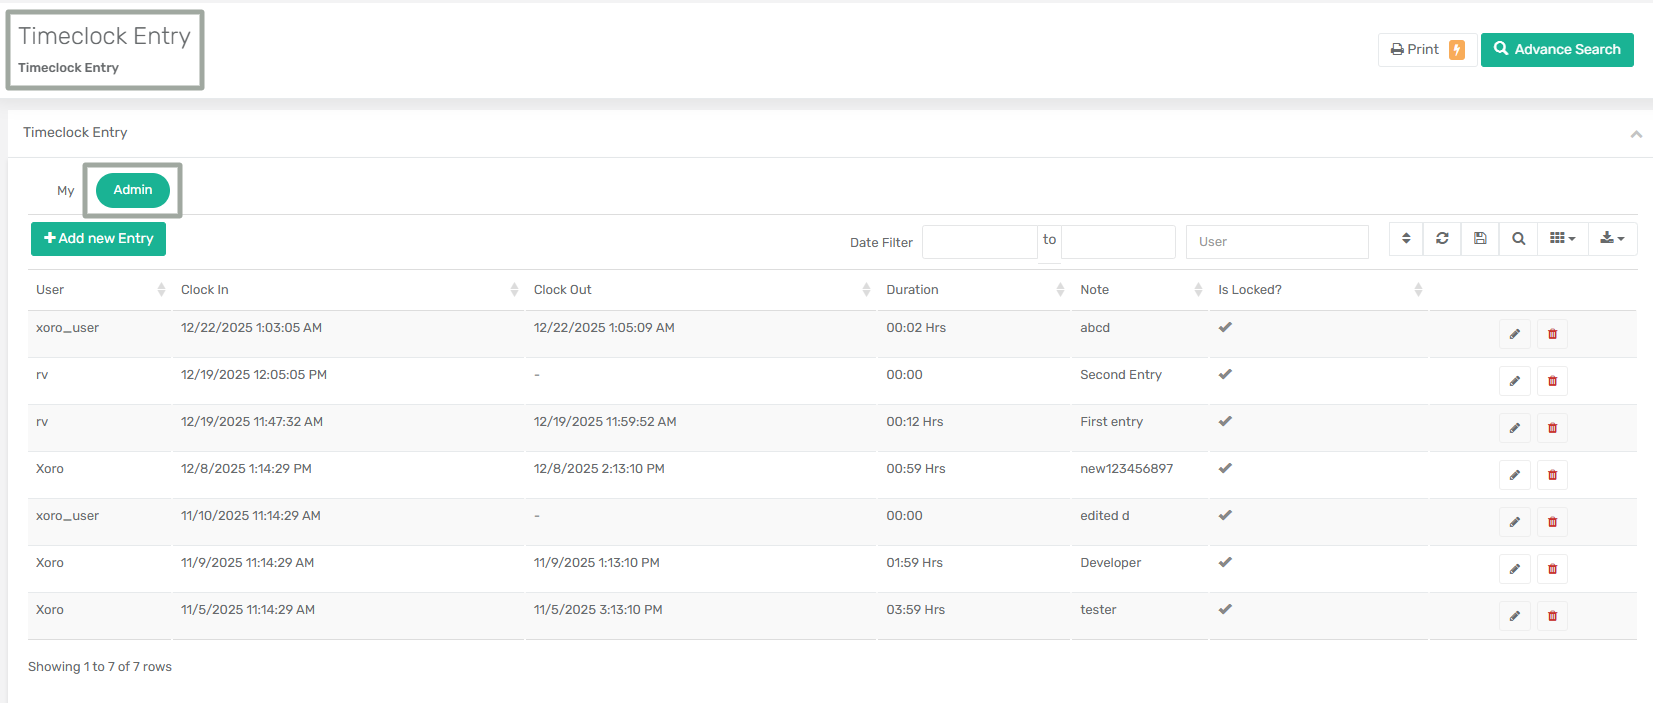
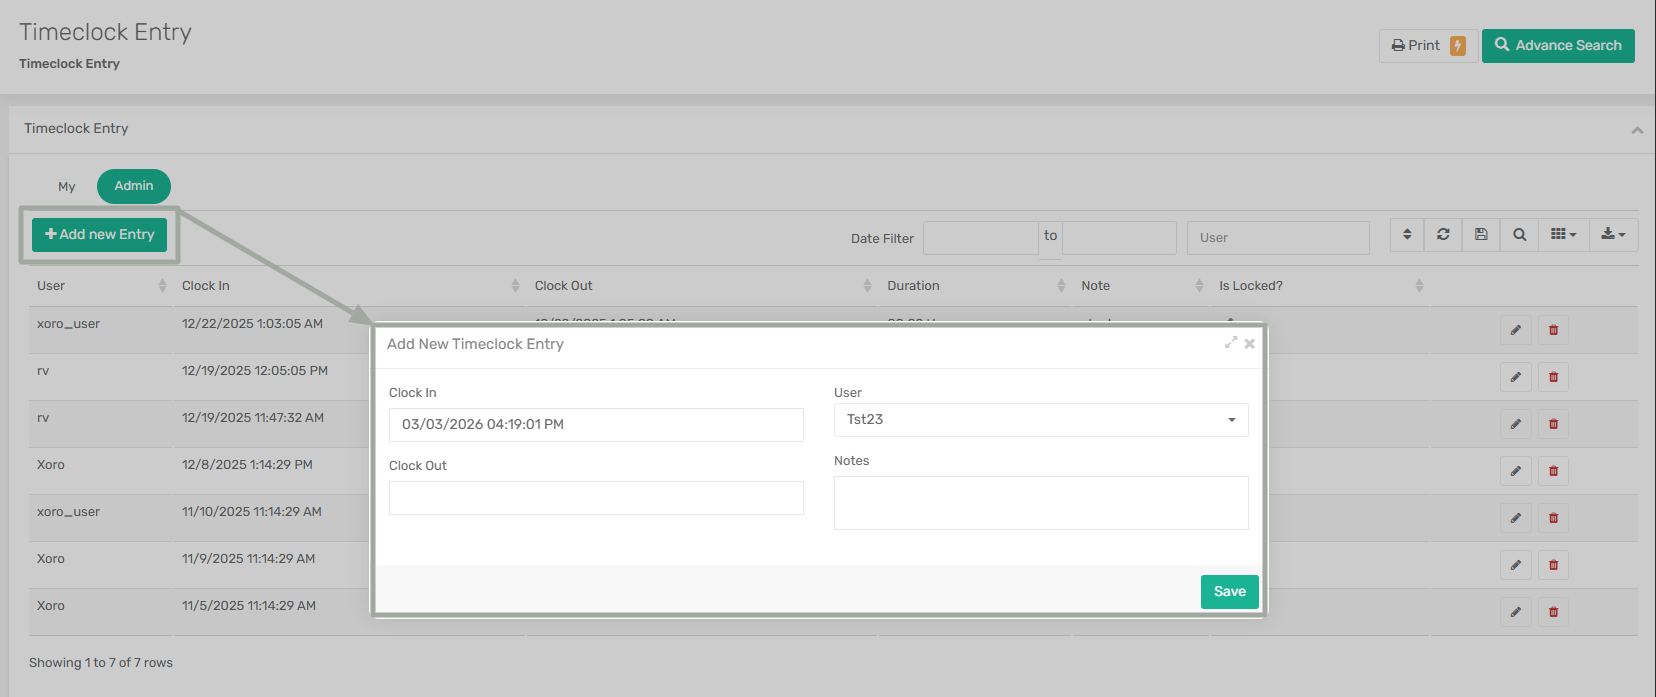
| Add New Entry | Admin | Time Managers, XAdmins | Allows manual creation of entries for any user. |
| Print | Admin | Time Managers | Prints time records. |
| Advance Search | My, Admin | All Users | Filters records using date/user filters. |
### Header Level Fields
The Header Level Fields allow users to filter records and enter an optional note while creating or editing time entries within the TimeClock Entry module.
| Field Name | Tab | Description |
| --------------- | --------- | ------------------------------------------------------------------------------------------------------------------------------------------------------ |
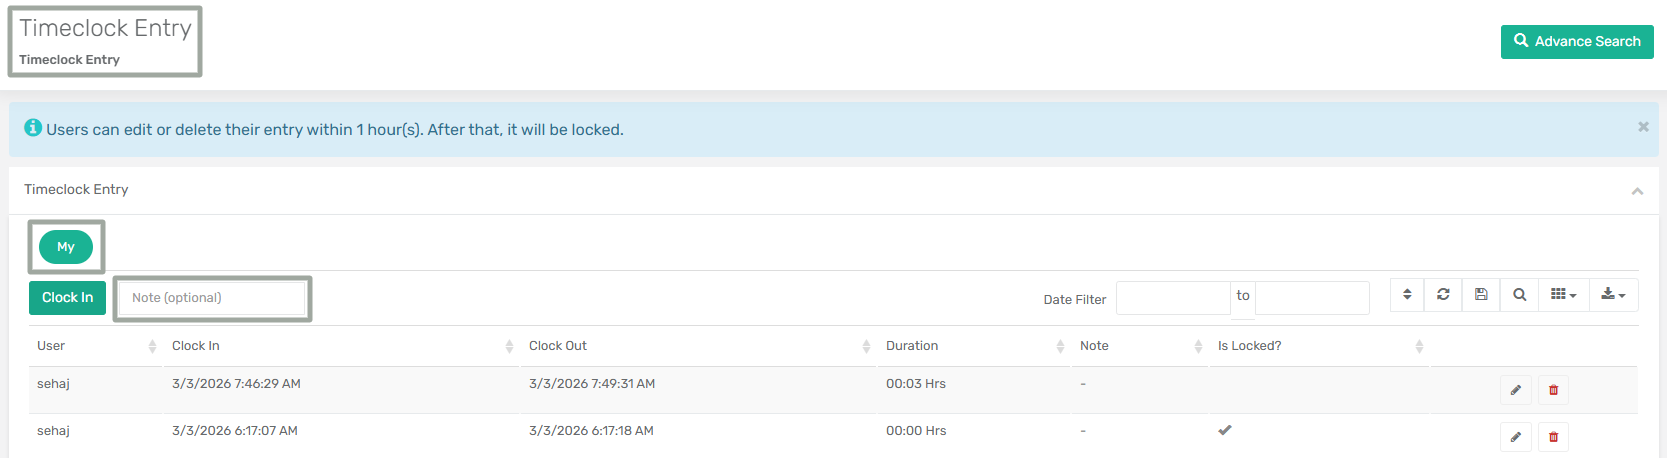
| Note (optional) | My, Admin | This field allows users to enter an optional comment while clocking in or editing an entry. The note supports a maximum of 255 characters. |
| Date Filter | My, Admin | This field allows users to select a specific date to view time entries. The system automatically defaults to the current date upon loading the module. |
| User | Admin | This field allows users to filter out entries related to a specific user. |
### Header Level Icons
These functionalities are designed to meet diverse operational needs, ensuring users experience seamless navigation and effective management of time tracking records within the TimeClock Entry module.
1. **Refresh**
* This functionality allows users to reload records based on the selected date range, user filters, and tab context. It ensures that the displayed information remains accurate and reflects the most recent system updates.
2. **Save:**
* The Save feature preserves updated user interface (UI) settings, such as column visibility preferences. This enables a personalized and consistent viewing experience during future interactions with the module.
3. **Advanced Search:**
* The Advanced Search option enhances data retrieval by allowing users to apply refined search criteria. Users can specify parameters such as Column Name, Operator, and Value to conduct precise and structured searches within the dataset.
4. **Edit:**
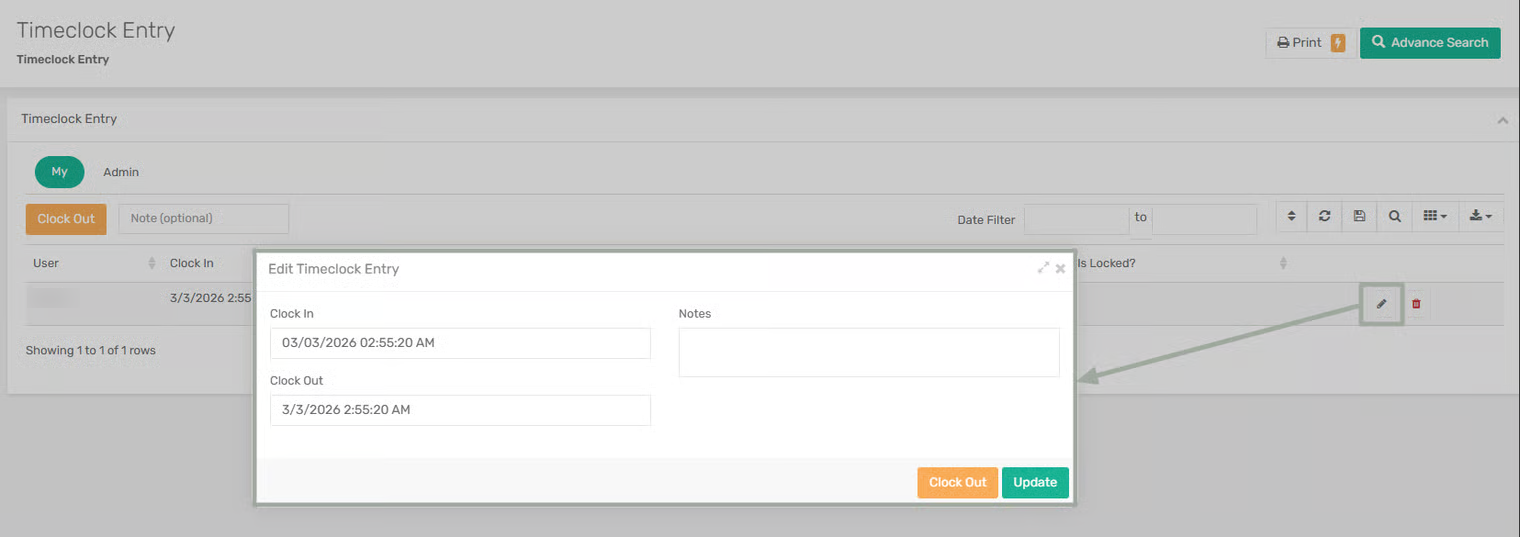
* The Edit icon allows users to modify an existing time entry. Regular users can edit their own entries until they are locked. Time Managers and XAdmins can edit any entry, including locked records.
4. **Delete:**
* The Delete icon allows users to remove a time entry from the system. Regular users can delete their own entries until they are locked. Time Managers and XAdmins can delete any entry, including locked records.
4. **Download:**
* This feature allows users to export time tracking records in multiple file formats for reporting and analysis purposes. Supported formats may include CSV, Excel, and PDF, depending on system configuration. This capability supports documentation, compliance, and managerial reporting needs.
7. **Columns:**
* The Columns option provides customizable visibility controls, enabling users to select which columns should be displayed in the table. The available column options dynamically adjust based on the active tab (My or Admin), ensuring relevance and usability.
| Column Name | Description |
| ----------------- | --------------------------------------------------------------------------------------------------------------------------------- |
| User | This field displays the name of the logged-in user associated with the time entry. |
| Clock In | This field shows the start date and time when the user clocked in. |
| Clock Out | This field displays the end date and time when the user clocked out. If the user is currently on shift, this field remains blank. |
| Duration | Displays the total calculated time between Clock In and Clock Out. It is system-generated. |
| Note | Displays the optional note entered at the time of clock-in or during editing (maximum 255 characters). |
| Is Locked? | This field indicates whether an entry is locked based on the configured lock duration. |
| Create DateTime | This field displays the system-generated timestamp when the entry was created. |
| Created By | Shows the name of the user who created the entry. |
| Modified DateTime | Displays the timestamp of the most recent modification made to the entry. |
| Modified By | This field displays the name of the user who last modified the entry. |
### Workflow
The TimeClock Entry module follows a structured workflow based on user role and entry status. The process ensures accurate time tracking while enforcing role-based permissions and validation controls.
1. If the **“Time Clock Manager"** toggle in the User module is disabled:
**Step 1:** Navigate to the TimeClock Entry module and ensure the **My** tab is selected. Enter an optional note if required (maximum 255 characters), then click the **Clock In** button.
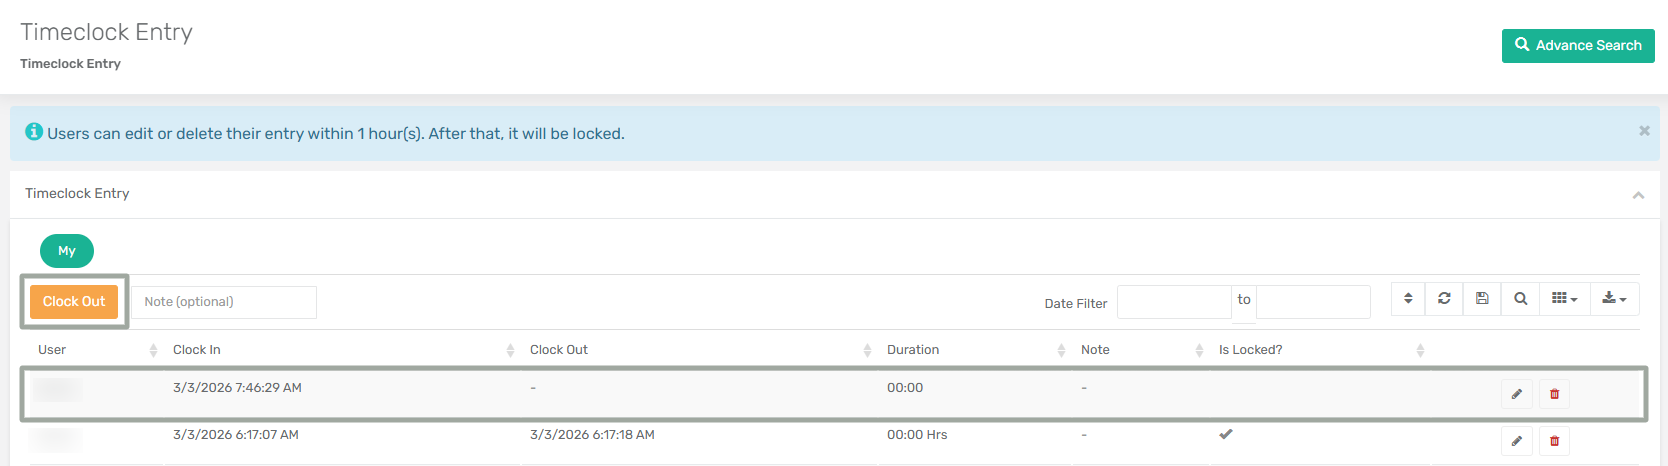
**Step 2:** The system creates a new time entry with the current date and time. The **Clock In** button dynamically changes to **Clock Out**, and the newly created entry appears at the top of the table.
**Step 3:** Once the shift is completed, click **Clock Out**. The system records the end time, and the **Duration** field is automatically calculated.
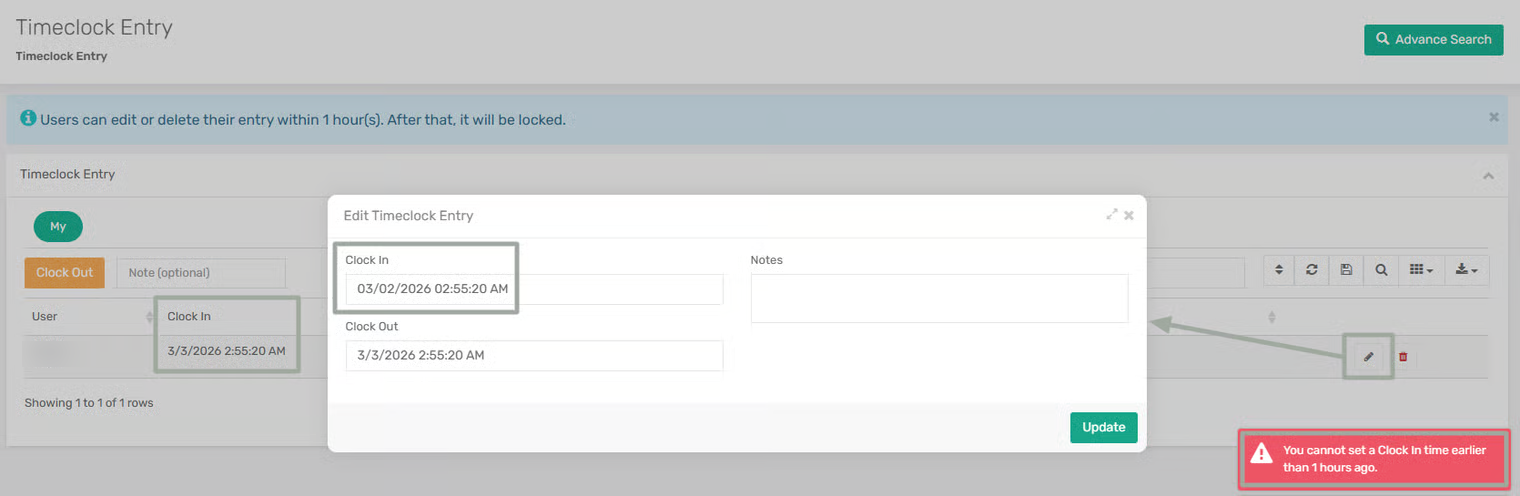
**Step 4:** Regular users can edit their own entries; however, they are not allowed to set a **Clock In** time earlier than 1 hour from the current system time.
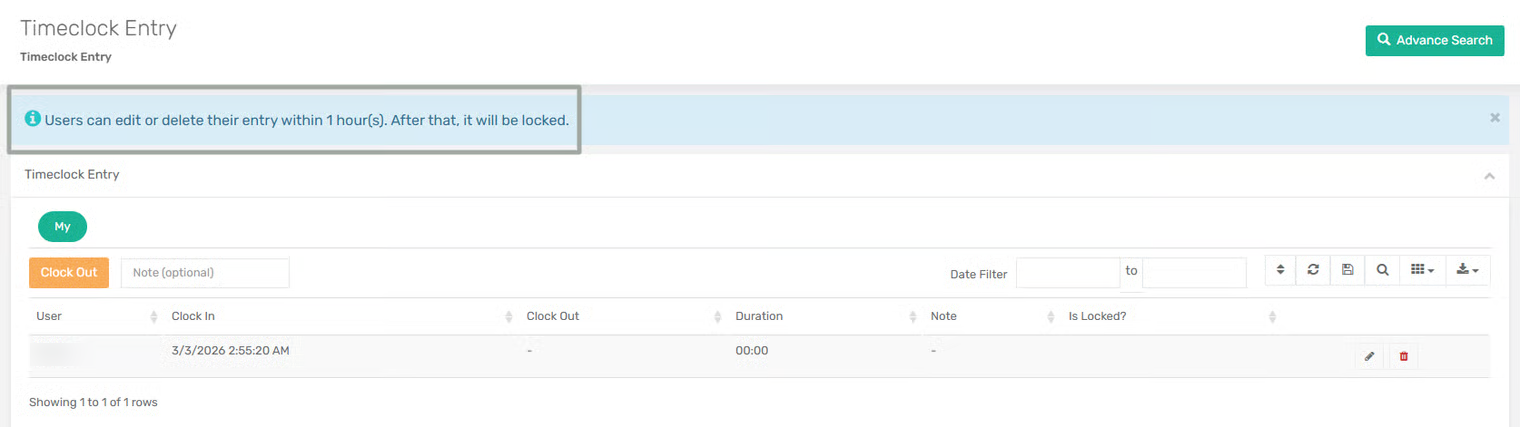
**Step 5:** A banner message also appears at the top of the page for regular users stating, “Users can edit or delete their entry within 1 hour(s). After that, it will be locked.”
2. If the **"Time Clock Manager"** toggle in the User module is enabled:
**Step 1:** The **Admin** tab also becomes visible in the TimeClock Entry module.
**Step 2:** Select the **Admin** tab and click **Add Entry**. Choose the required user from the dropdown for whom the time entry needs to be created. Enter the **Clock In** and **Clock Out** times along with an optional note, if required.
**Step 3:** Time Managers can create or edit entries in both the tabs. They are also allowed to edit entries that are locked.
{% hint style="info" %}
Managers can set **Clock In** and **Clock Out** times to past date-times in both the **My** and **Admin** tabs, provided the time is not greater than the current system time.
{% endhint %}
### Validation Rules
The TimeClock Entry module enforces strict validation controls to ensure data accuracy, prevent conflicts, and maintain system integrity. These validations apply at both the user interface level and service layer.
* Start datetime cannot be null.
* Start datetime and end datetime cannot be greater than the current datetime.
* Start datetime cannot be greater than end datetime.
* Normal users cannot update, delete, or clock out locked entries.
* Normal users cannot add entries that overlap with existing time ranges or are in locked range.
---
# Agent Instructions
This documentation is published with GitBook. GitBook is the documentation platform designed so that both humans and AI agents can read, navigate, and reason over technical content effectively. Learn more at gitbook.com.
## Querying This Documentation
If you need additional information that is not directly available in this page, you can query the documentation by asking a question.
Perform an HTTP GET request on the following URL with the `ask` and `goal` query parameters:
```
GET https://docs.xorosoft.com/xoroerp-1/admin/timeclock-entry/timeclock-entry-fields.md?ask=&goal=
```
`ask` is the immediate question: it should be specific, self-contained, and written in natural language.
`goal` is what the user is ultimately trying to achieve, the reason they need the answer. Sharing it helps GitBook give you a better, more relevant answer. A goal is most helpful when it describes the outcome the user wants rather than restating the question. For example, with `ask=how do I create an API token`, a goal like `automate deployments from our CI pipeline` lets GitBook tailor the answer to that use case.
The response will contain a direct answer to the question and relevant excerpts and sources from the documentation.
Use this mechanism when the answer is not explicitly present in the current page, you need clarification or additional context, or you want to retrieve related documentation sections.